How to Guide - Screen Cleaning
Synopsis...
Removing the ink and stencil off the screen can be a messy and arduous task if the wrong products or cleaning processes are used. This How to Guide will look at the simple steps that can be taken to help you get the best results thus saving you time and money.
Ink removal can be split into three main applications:
On-Press cleaning
- The products used are often referred to as ‘Screen Openers’ or ‘Press washes’ as they open up blocked areas of the stencil, or wash off ink that has flooded around the image whilst the screen is still in the printing machine. These Screen Openers are typically fast drying screen solvents that quickly dissolve the ink and then evaporate off to allow the screen to recommence printing.
Screen archiving
- If the screen is going to be re-used at a later date to print the same image, then it is often best to simply remove all the old ink from the screen and then store (archive) the screen. ‘Screen Cleaners’ are typically powerful, slow evaporating solvents that will not damage the stencil but allow the screen to be cleaned thoroughly and then allowed to dry during storage.
Screen decoating
- If the job is completed and the mesh is needed to be reused for the next print job, then the ink needs to be removed completely ready for the stencil to be stripped. ‘Screen Washes’ are very powerful, slow evaporating solvents that are water washable which allow the screen to be rinsed clean.
Screen Openers
There is a fine balance of performance required for screen openers. You need a solvent that is powerful enough to quickly dissolve the inks you are using, but not too powerful that it causes the stencil to soften or swell. You also want a solvent that remains liquid long enough to clean the ink, yet dries quickly so that you can recommence printing. Inevitably this will result in a compromise and therefore careful selection of the best screen opener is key.
Screen Openers are typically fast evaporating and used whilst the screen is in the press so it is important that there is good ventilation directly above the screen. You only need to use a small amount of Screen Opener solvent on each screen, so a plunger can is a good investment.
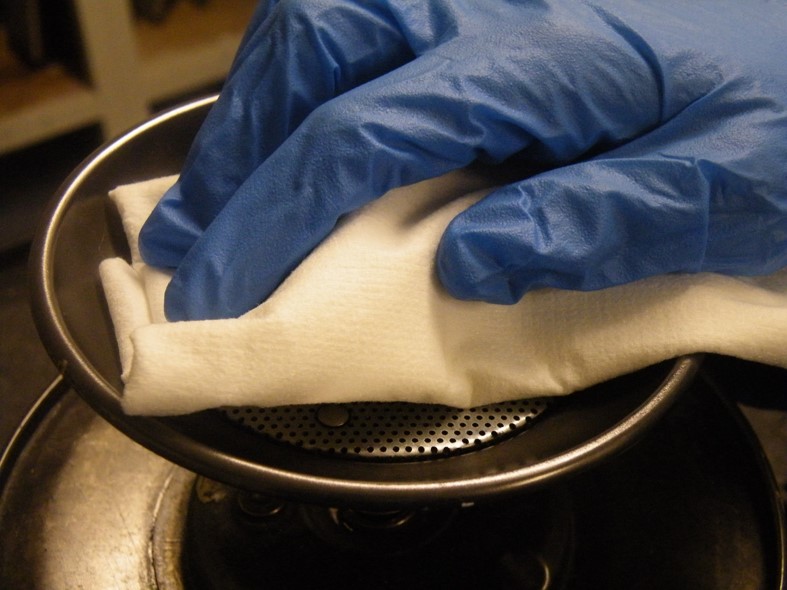
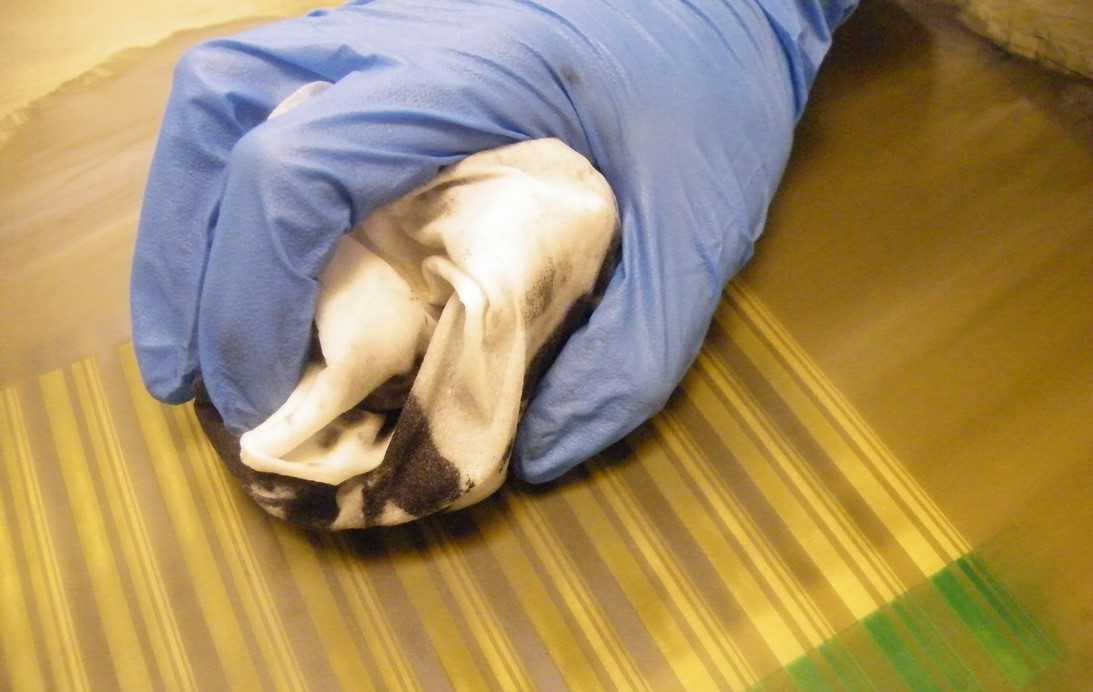
Apply the Screen Opener with a good quality lint free screen cleaning cloth or rag and make sure that the contaminated cloths are put in a flame proof bin.
Always wear the recommended Personal Protective Equipment when handling any solvents.
Screen Cleaners
Screen Cleaners can either be used on, or off the press and are typically used in the same way as a Screen Opener by applying the solvent to a lint free cloth from a plunger can. The biggest difference is that Screen Cleaners are much slower to evaporate and so can be worked on for longer on the screen. Do not rub from the print side of the screen or use a brush to apply the Screen Cleaner as there is a risk of damaging the stencil surface.
Top Tip: When using either a Screen Opener or Screen Cleaner, to prevent possible damage to the stencil we recommend that you hold a dry cloth against the print side of the screen and use the solvent soaked cloth from the squeegee side only. As you dissolve the ink, turn the print side cloth regularly. Do not rub the print side stencil! This will give you the maximum cleaning efficiency with the least chance of damaging the stencil.
Screen Washes
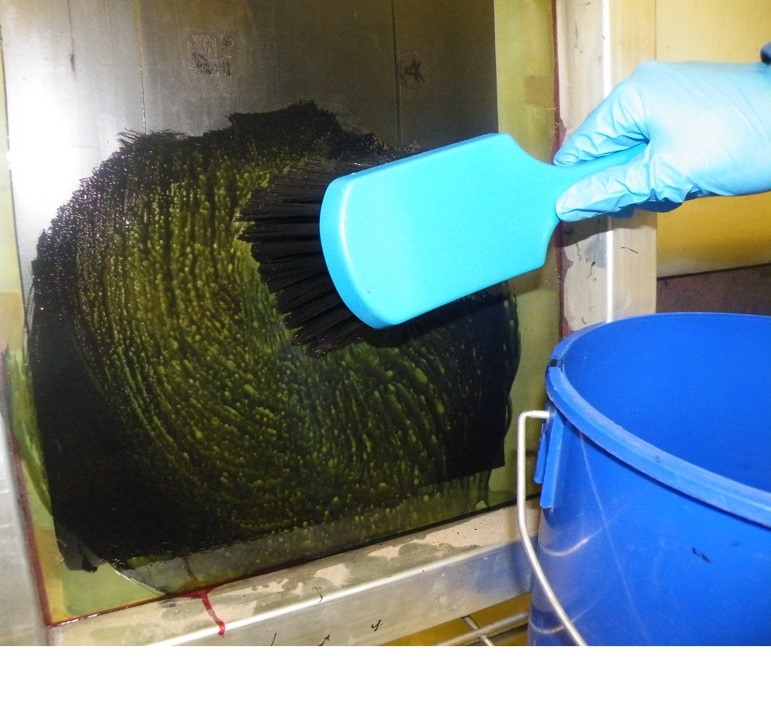
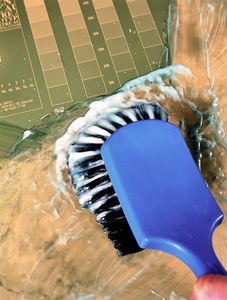
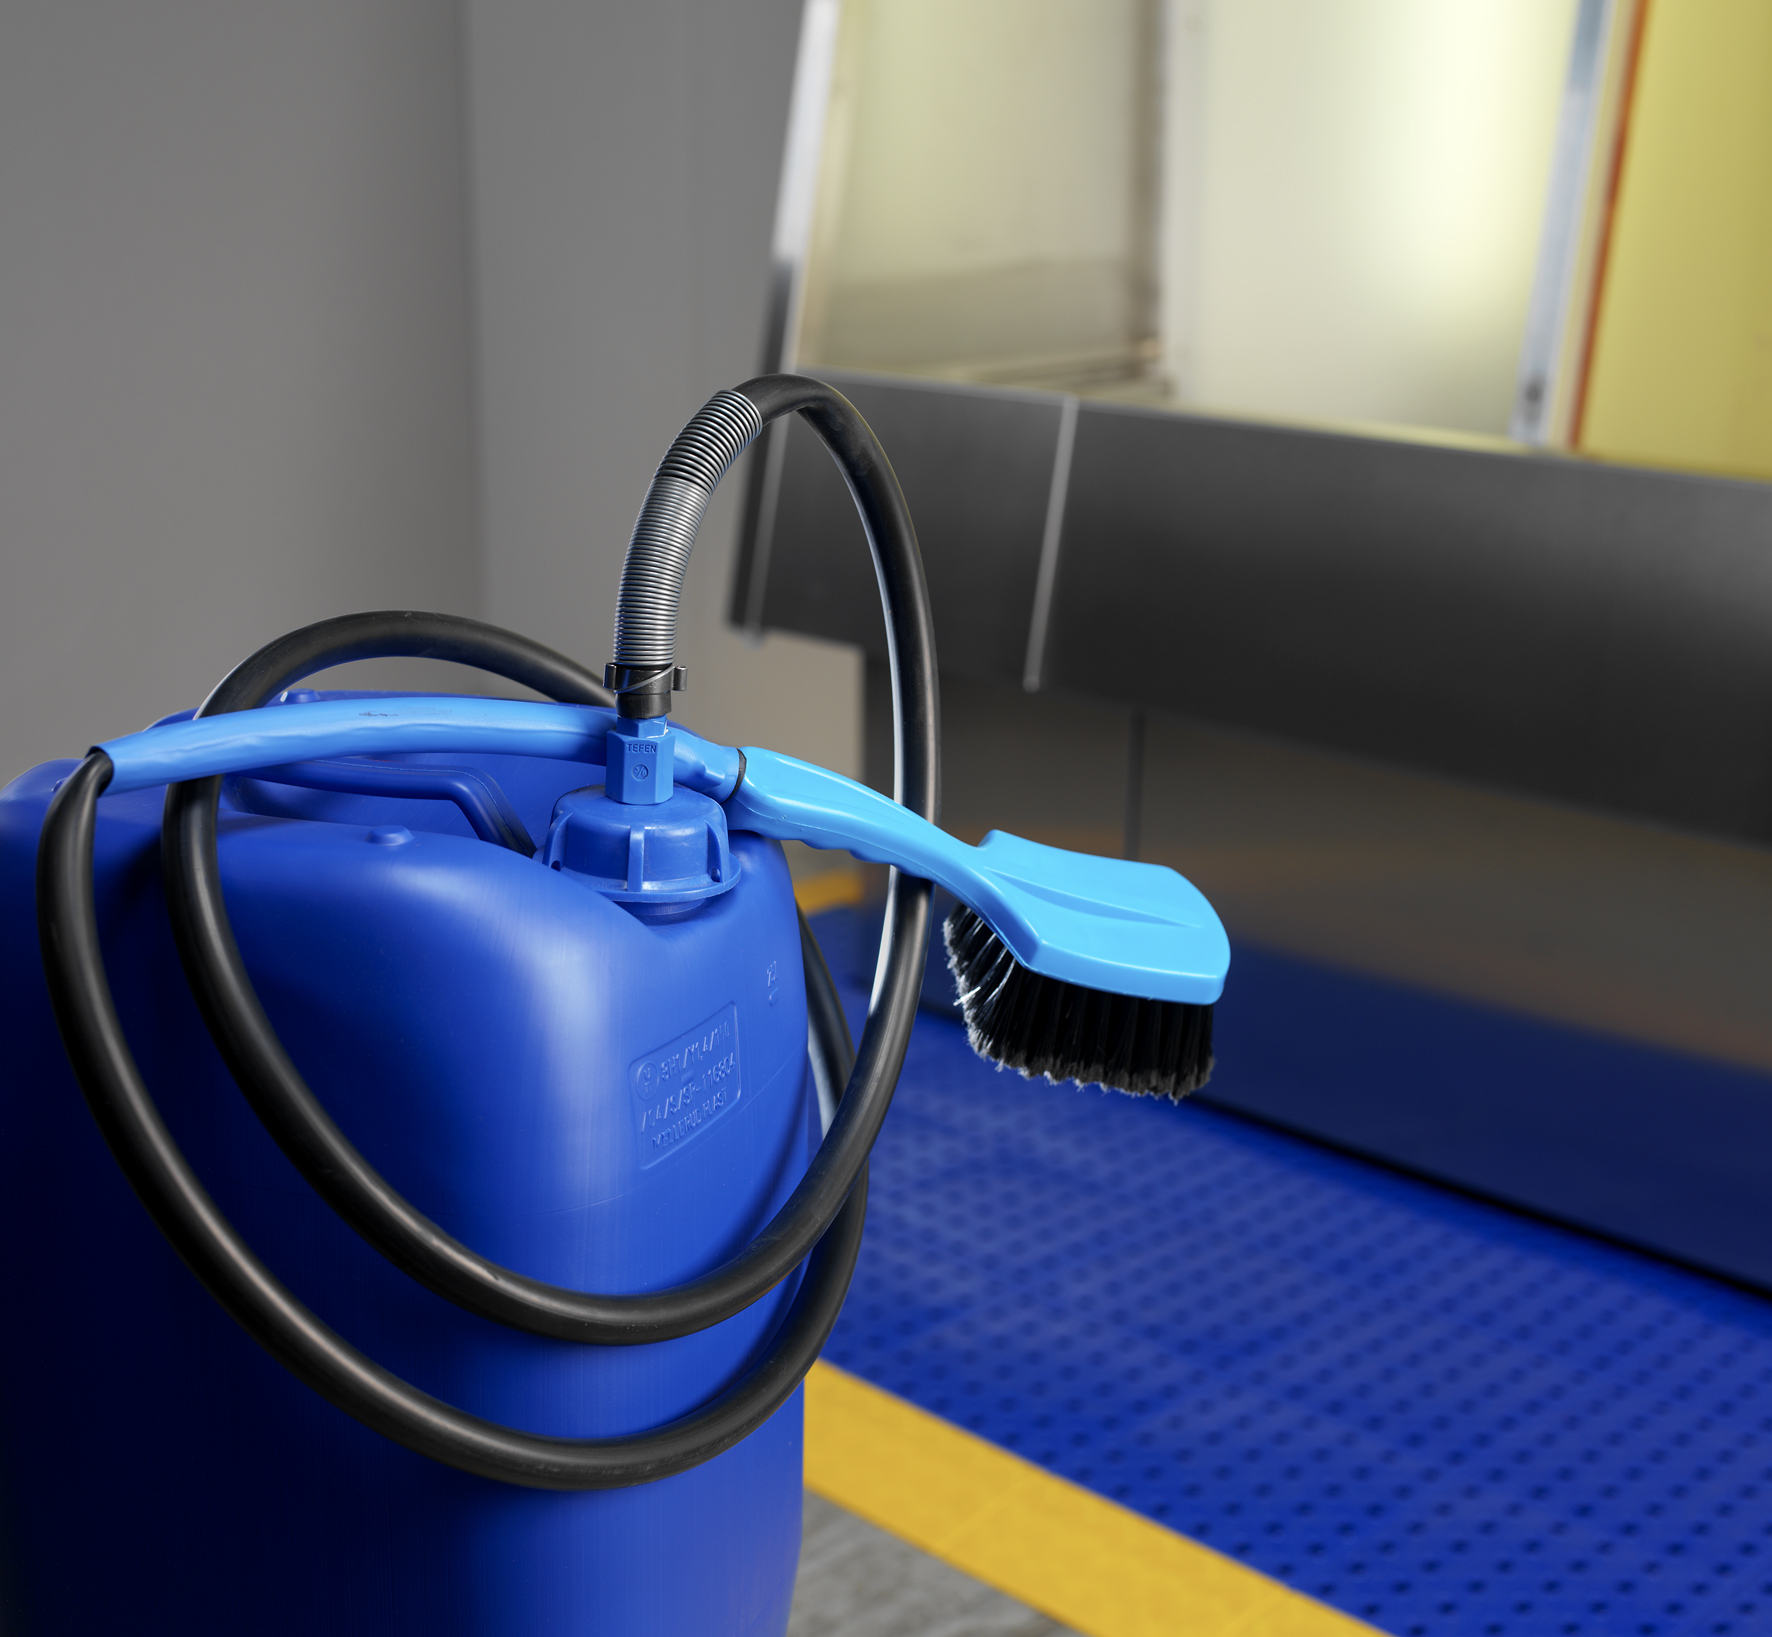
The majority of screens are reclaimed after printing, so there is a much wider selection of Screen Washes available. Screen washes are made from a blend of powerful, slow evaporating solvents combined with water emulsifying agents so that they can be rinsed away with water. Screen Washes can either be applied manually or in automated screen cleaning machines. For best results the Screen Wash is applied to the mesh using the Autotype Brush. The soft, chemically resistant fibres will not damage even the finest mesh and the flagged ends of the fibres maximise the liquid retention. Apply the Screen Wash to both sides of the screen to make sure that all the ink is fully dissolved.
Top tip: It is always advisable to start the cleaning from the top of the screen and work downwards as this will minimise run-off.
The slow evaporation rate of the Screen Wash solvents ensure that the solvent stays where you want it, on the mesh dissolving the ink and not disappearing into the air. Once all the ink is fully dissolved the screen can be rinsed clean with a strong spray of cold water. Do not use hot water as this will cause the solvent to evaporate. Always rinse the screen clean before using a high pressure gun. If you blast the Screen Wash off with the gun it will atomise the solvent, contaminating other screens and creating a potential safety issue for the operator. Contact your local water authority before using a Screen Wash to see what restrictions apply to waste water effluent contamination.
Top tip: It is good practice to decant some of the Screen Wash into the Autotype Blue Bucket before use as this is the most economical way to use the brush and prevent cross-contamination.
Aqua Washes
Most Screen Washes are designed to be used neat without diluting before use, however the new range of Aqua Washes allow the operator to dilute the Screen Wash by as much as 5 parts with water to give the maximum economy. The final dilution ratio will be dictated by the ink type and therefore it is essential to test out different dilution ratios first. Aqua washes are diluted with water in the bucket and will require stirring immediately before use.
Stencil Removal
Once the ink has been removed from the screen it is now possible to strip the stencil. This How to Guide will focus solely on decoating polymer direct stencils (PLUS emulsions and Capillex films). For information on removing Gelatine Indirect photo-stencil films, please refer to the How to Guide to Processing Five Star.
Firstly stencil removal is quickest and easiest if it is conducted immediately after the ink has been removed and the screen is still wet. If the screen is allowed to dry out at any stage of the cleaning process it will be slightly harder to clean.
Autostrip stencil decoating solution is offered in a number of different strengths, from a ready-to-use premix, right up to a highly concentrated product that can be diluted with up to 50 parts water. The choice of which strength to choose will depend on your working processes and the number of screens that are processed in one day.
The stencil decoating stages are as follows:
- Wear the recommended PPE
- Wet the screen
- Apply Autostrip to both sides of the screen
- Wait for 1 minute
- Brush in the Autostrip using an Autotype Brush until all the stencil is dissolved
- Rinse off with a low pressure cold water spray
- Blast of any residues with a high pressure gun.
Top tip: Always rinse the chemicals off the screen before using the high pressure gun otherwise you will atomise the chemical which could be breathed in by the operator and/or could land on cleaned screens and cause pin holes in subsequent stencils.
If any stains or ghost images do remain on the screen after using the high pressure gun, then you will need to use a haze remover, please see the How to Guide to Haze Removal for essential advice on how to get them back to ‘nearly new’ condition again.
Brush pump
The Brush pump is an excellent tool for use with Screen Washes as it can be attached directly into the 25 litre drums. The Brush Pump requires no air or electrical connections as the pump works simply by moving the brush enabling the operator to simply and cleanly apply the solvent to the screen.
Safe handling
All chemicals are intrinsically hazardous and therefore it is very important to wear the recommended Personal Protective Equipment when using them. Always refer to Section 8 of the Safety Data Sheet for information on what PPE to wear. In addition to the PPE, solvents should always be used in a well ventilated area to minimise exposure.
Dip tanks
Dip tanks ae becoming increasingly popular now, especially for textile printers, as they allow an all-in-one cleaner (a mixture of Aquawash and stencil remover, or a specialised stencil remover) to soften the stencil and ink at the same time, freeing you up to rinse and clean another screen whilst it is in the tank. Alternatively, you can use dip tanks separately with an Aquawash based product for the ink removal in one tank and a stencil remover for the stencil reclaim in another tank.
The principle behind a dip tank is to save screen printers time and money on the reclaim process. This can be true while the chemicals are fresh and new, however, over time as the chemistry strength decreases, you may need to start physically brushing the screens to get them clean. You may also use a larger volume of chemistry in comparison to the bucket and brush process as regular top ups are required to keep the chemical in a working condition.
Top tip: In reality you are unlikely to save time and money with a dip tank unless you are cleaning between 20 and 30 screens per day.
Designing a screen cleaning area
Screen cleaning should be kept separate from screen making as there a potential for cross-contamination. Screen cleaning is by its very nature quite a dirty operation and careful thought needs to go into how to minimise waste generation and operator exposure, and at the same time maximise the effectiveness of the operation. The How to Guide to designing a screen making facility has lots of good advice on how to get the best out of your facility.
Automated screen cleaning
If you are regularly cleaning more than 10 screens per day, it is probably worth investigating the viability of some form of automated screen cleaning for your production. There are many levels of automation from simple, manual ink cleaning booths with recirculation pumps all the way through to fully automated in-line cleaning systems. The size and type will be dictated by screen format, usage and local waste water regulations.


